Decorative wall moulding R1225

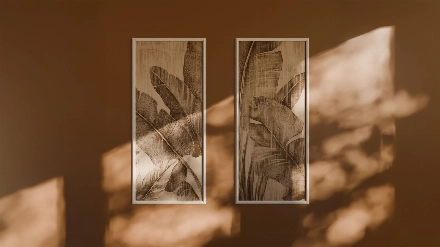
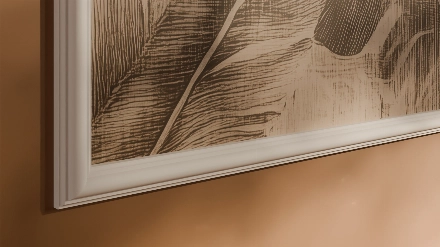
The decorative wall moulding R1225 is an exceptional detail that allows you to emphasize the style of the interior and give it an elegant character. It works perfectly when creating spectacular stucco frames – a solution that has been popular in interior design for years. The slim profile of the moulding gives compositions lightness, while introducing a touch of class and sophistication to the room.

Thanks to the use of modern materials, the R1225 moulding stands out for its high durability and resistance to daily use. Its surface is protected against scratches, and its resistance to mold and fungi makes the product ideal for use in moisture-prone areas. Invisible joints ensure an aesthetic effect, and the LightShield system protects against LED light shining through, allowing the moulding to be used in modern lighting arrangements.

The decorative moulding is available in white, ready for installation, with the option to be painted in any shade. This allows it to be perfectly matched to the room's color scheme – both in classic and modern arrangements. The quick and easy installation makes the product ideal for professional projects as well as DIY finishing work.

R1225 is a wall moulding that combines aesthetics, functionality, and ecology – made from environmentally friendly materials, it is a conscious choice for those who appreciate design and quality. It fits perfectly in a living room, bedroom, dining room, or office, emphasizing the character of the interior and giving it a unique style.
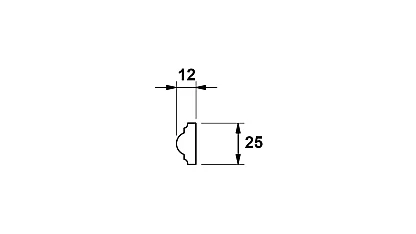
Width: 12 mm

Height: 25 mm

Length: 2500 mm

Color: White


Price: 8,94 $

Assembly instructions

Preparing the walls
Trimming moldings
Adhesive Mounting
Painting
Start by washing the surface (with a damp sponge) and removing any remnants of old glue, then thoroughly dry it. If the wall is painted, check the adhesion of the paint: stick painter's tape and pull it off vigorously. If the paint comes off with the tape, the area needs priming. After priming, repeat the test. If the paint still peels off, complete removal of the coating may be necessary.
The skirting boards can be easily cut, trimmed, and joined into longer sections. To cut them, use a hand saw or an electric saw with a fine-toothed blade. The most aesthetic and durable joints can be achieved by setting a 45° angle. When cutting by hand, use a miter box. Lightly sand the edges after cutting with sandpaper to ensure smooth joints. Avoid sections shorter than 50 cm.
Assembly with glue is the most popular method. Apply mounting adhesive in a continuous line (preferably in a zigzag pattern) on the edge of the strip that will be in contact with the wall, press the strip against the wall, and hold it for several seconds. Gently remove excess glue with a damp sponge or putty knife. Leave the strips for 24 hours to dry completely. Then fill in small gaps at the joints with filler glue.
After about 24 hours, the mounting and joining adhesive will reach full strength. Wipe the moldings with a slightly damp sponge and proceed to paint. The moldings are factory-primed, so you can paint them with popular interior paints — even the same one as the walls. For the best coverage, it is recommended to apply two coats.

Dedicated PARA Paints:

We offer specially dedicated PARA brand paints that are perfectly matched to our wallpapers. This unique option allows for creating a perfectly cohesive interior look, where paint and wallpaper complement each other, creating a harmonious whole. Our paints are available in a wide range of colors, allowing for precise matching to the patterns and colors of wallpapers chosen by the customer. This solution is ideal for those looking for not only an aesthetic but also a practical way to finish their walls, ensuring durability and stylish finishing of every room.

Subscribe to the newsletter

Receive exclusive email updates about new products and interior design inspirations.

By clicking "sign up" you declare that you accept the Terms and Conditions of the website.